Tuesday, July 24, 2012

Cross Domain AJAX Calls with PhoneGap and jQuery

When creating a PhoneGap app, you are essentially creating a web page and it lives in the 'localhost' domain. Unfortunately, by default AJAX calls are only supported in the same domain - unless you use JSONP (JSON with padding). You can read more about JSONP here: http://en.wikipedia.org/wiki/JSONP

Create the Mobile Web Page

Ok, let's cheat... well, is saving time cheating?  I went to http://jquerymobile.com/ and used the prototyping tool and built a quick HTML5 page.


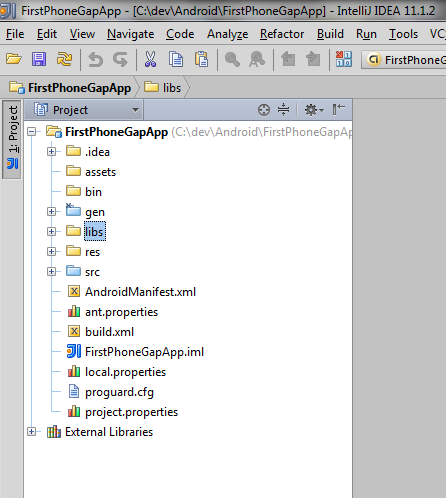
When I was finished, I clicked the "Download HTML" button and was given a neat little zip file with a web page, a CSS file and a JS file. I renamed the CSS and JS files to demo.* and copied them into my PhoneGap www\include folder.

I dropped the HTML page into the www folder and opened it in the editor.  I modified the HTML file to reference the newly added CSS and JS. I renamed the HTML file to ajaxdemo.html.  I also had to update the main java file of the PhoneGap app.

public void onCreate(Bundle savedInstanceState)  
   {  
     super.onCreate(savedInstanceState);  
     //setContentView(R.layout.main);  
     super.loadUrl("file:///android_asset/www/ajaxdemo.html");  
   }  

For a quick test, I viewed the HTML file in a browser to make sure it looks OK.  I could, at this point, compile and run the app in my phone.

Add a PHP Page to Call With AJAX

This is a very simple PHP page.  All we want to do is take some parameters from the Request and return a JSON object wrapped in a JSONP function.  You'll see what I mean when you read the code. I call this name.php.

firstname = $_GET['first'];  
 $theName->lastname = $_GET['last'];
  
 echo $_GET['callback'] .'('. json_encode($theName) . ')';  
 ?>  

The first lines simply grab the request values from the GET collection and assign it to a dynamically created object. PHP is like JavaScript in that you can create an object's members on the fly.

The JSONP part of this return is the
echo $_GET['callback'] .'('. json_encode($theName) . ')'
part.  When we create the actual AJAX request, we will declare a function in which to wrap our JSON response. This is part of our GET request. You'll see more when we build the AJAX request.

The PHP function json_encode()  is handy for taking your object or collection and turning it into a JSON object. You can find more info here.

I uploaded this file to my hosting account, so I can call it from my local code. After uploading, I can simulate the AJAX call with the following URL:
http://mysite.com/name.php?callback=jp&first=pat&last=buff

If you've copied my code correctly, you should see results that look like:
jp({"firstname":"pat","lastname":"buff"})

Now For AJAX and other JavaScript

The server-side code is in place.  Let's add the JavaScript.
    function appReady(){  
       $("#infodiv").html("Testing JSONP with jQuery");  
     }  
   
     $(document).ready(function(){  
       $("#get-name").click(function(){  
         handleClick();  
       });  
   
       $("#ajax_error").ajaxError(function(e, jqxhr, settings, exception) {  
         $(this).text( "Error requesting page " + settings.url);  
       });  
     });  
   
     document.addEventListener("deviceready", appReady, false);  
   
     $( document ).bind( "mobileinit", function() {  
       // Make your jQuery Mobile framework configuration changes here!  
       $("#infodiv").html('mobileinit worked');  
       $.mobile.allowCrossDomainPages = true;  
     });  
   
     function handleClick(){  
       var url = 'http://fineglasswork.com/histmarkers/client/partial.php';  
   
       $.ajax({  
         type: 'GET',  
         url: url,  
         contentType: "application/json",  
         dataType: 'jsonp',  
         data: {first: $("#firstname").val(), last: $("#lastname").val() },  
         crossDomain: true,  
         success: function(res) {  
           $("#resultsdiv").html("Hello, " + res.firstname + " " + res.lastname);  
           console.dir(res.fullname);  
         },  
         error: function(e) {  
           console.log(e.message);  
         },  
         complete: function(data) {  
           console.log(e.message);  
         }  
       });  
   
     }  

The guts of this script - the part we want to focus on - is the handleClick() function.  This is where we make our AJAX call with jQuery. We should pay special attention to these parameters:

         contentType: "application/json",  
         dataType: 'jsonp',  
         data: {first: $("#firstname").val(), last: $("#lastname").val() },  
         crossDomain: true,  

Declaring the dataType as 'jsonp' will automatically add the 'callback' parameter to the GET request. crossDomain is set to true (of course! otherwise we wouldn't need to use JSONP). The data is passed as a JSON object.  The data elements will automatically be added to the GET request for us - no need to build a URL with a querystring.

We are ready to run our code!  I usually use my HTC Evo, but in this case, I ran it with an emulator so I could get this beautiful screen shot.  I entered a first name and last into the Text fields and clicked the "Click Me" button to get this result.


Now isn't that just gorgeous!

Something you might notice is that the heading is different when you see the page in your browser.  That's because we modify that header in the appReady handler.  The appReady handler is defined in this line:
    document.addEventListener("deviceready", appReady, false);  
The deviceready event is used to notify the app that PhoneGap is loaded.  When writing PhoneGap apps, you should wait until deviceready event is called before depending on any PhoneGap functionality to be available.

That's it for now!  I hope this was helpful.  Please feel free to ask questions or suggest changes.

Edit: I've uploaded the code in this Post to GitHub. https://github.com/RichBuff/PhoneGap-App-with-JSONP-AJAX-Call


You can also find this article on my new blog site: http://alpheussoftware.com/?p=20


Sunday, July 1, 2012

Create Your First Android PhoneGap App With IntelliJIDEA

IntelliJIdea for Android Mobile Development


I have been using JetBrains IntelliJIdea to write my Android mobile code.  I've been using Resharper for my Visual Studio (ASP.Net / MVC) projects and I wholeheartedly recommend the tool.  Imagine my geeky excitement when I saw that my favorite VS enhancement had an Android IDE!!

Nothing against Eclipse - I love Eclipse and have used it for my Java development for years now.

I recommend that you start here to begin using IntelliJIdea as your Android IDE. The link takes you to a page that describes how to set up Idea and write your first Android app. Prerequisites are:
  • JDK is available on your machine.
  • Android SDK is installed on your machine. 
  • Download PhoneGap. I'm using version 1.8.1. You might need to make slight adjustments for subsequent versions.

PhoneGap With IntelliJIdea

PhoneGap is a tool that allows developers to write their mobile apps using open standards - HTML5, CSS, JavaScript. Without PhoneGap, we can use expensive tools like MonoTouch ($999.00 per platform). My company uses MonoTouch and it really helps to alleviate the largest problem with cross platform mobile development - finding people that know ObjectiveC and Java.

PhoneGap takes a different approach - write your client code in HTML5, using open source tools like jQuery Mobile to create rich UIs. These HTML pages make AJAX calls to web services that deliver dynamic info.

These same pages can be deployed embedded in your iOS app, your Android app, or simply deployed as a mobile web app viewable in a device's browser.

There are plenty of places that show you how to build PhoneGap apps using Eclipse, but I haven't found any that describe the process for creating PhoneGap projects in IntelliJIdea.  Until now!  :-)

Begin by opening IntelliJIdea and selecting Create New Project. In the dialog box, select Create Project From Scratch.


I called my new project FirstPhoneGapApp.  Select Android Module in the "Select Type" list.


I pretty much took the default settings for the rest of the screens.  I did pick USB device rather than an emulator on the last screen.  If you don't have a device to debug on, then an emulator should work fine.

Now you should have a project in the IDE.  It should like something like this:


Right click on the libs folder and select "Show In Explorer" from the context menu.  Copy your cordova-1.8.1.jar file into this folder.

Right click the assets folder and select "Show In Explorer" from the context menu.  Create a new folder called "www".  Copy your cordova-1.8.1.js file into this folder.

Your project should looks like this. 


Right click on the Project Name (in this case FirstPhoneGapApp) and select "Open Module Settings". Pressing F4 will open the same dialog box. This is the Project Structure dialog.

Select Libraries and then click the little '+' icon near the top of the dialog. Select Java.  Drill into the folder structure and select the cordoba.1.8.1.jar file that you added earlier. Click OK, then click OK again in the confirmation. You've added the cordoba jar file to your classpath.


Expand the Res folder, right click and add a new folder called 'xml'.  Go to this link and download the plugins.xml file.  Add this file to the xml folder you just created.

Open the AndroidManifest.xml file.  Paste the following between the
 <uses-sdk...>  
and the
 <application...>  
tags.

<supports-screens 
    android:largeScreens="true" 
    android:normalScreens="true" 
    android:smallScreens="true" 
    android:resizeable="true" 
    android:anyDensity="true" />
<uses-permission android:name="android.permission.VIBRATE" />
<uses-permission android:name="android.permission.ACCESS_COARSE_LOCATION" />
<uses-permission android:name="android.permission.ACCESS_FINE_LOCATION" />
<uses-permission android:name="android.permission.ACCESS_LOCATION_EXTRA_COMMANDS" />
<uses-permission android:name="android.permission.READ_PHONE_STATE" />
<uses-permission android:name="android.permission.INTERNET" />
<uses-permission android:name="android.permission.RECEIVE_SMS" />
<uses-permission android:name="android.permission.RECORD_AUDIO" />
<uses-permission android:name="android.permission.MODIFY_AUDIO_SETTINGS" />
<uses-permission android:name="android.permission.READ_CONTACTS" />
<uses-permission android:name="android.permission.WRITE_CONTACTS" />
<uses-permission android:name="android.permission.WRITE_EXTERNAL_STORAGE" />
<uses-permission android:name="android.permission.ACCESS_NETWORK_STATE" /> 
<uses-permission android:name="android.permission.GET_ACCOUNTS" />
<uses-permission android:name="android.permission.BROADCAST_STICKY" />

Now open the src folder and the package name.  If you chose the default file name when creating your
project, then your file name is MyActivity. Open it in the editor.

At the top, enter the following line with the other import statements: import org.apache.cordova.*;

Change the class declaration to look like the following:

 public class HistoricMarkers extends DroidGap  
 {  
   /** Called when the activity is first created. */  
   @Override  
   public void onCreate(Bundle savedInstanceState)  
   {  
     super.onCreate(savedInstanceState);  
     //setContentView(R.layout.main);  
     super.loadUrl("file:///android_asset/www/index.html");  
   }  
 }  

OK - 1 more step.  Let's create the HTML file.

 <!DOCTYPE HTML PUBLIC "-//W3C//DTD HTML 4.01 Transitional//EN"  
     "http://www.w3.org/TR/html4/loose.dtd">  
 <html>  
 <head>  
   <script type="text/javascript" charset="utf-8" src="cordova-1.8.1.js"></script>  
   <title></title>  
 </head>  
 <body>  
 <h2>Hello, Rich Buff!!</h2>  
 </body>  
 </html>  

Because of my insatiable narcissism, I am compelled to see the message "Hello, Rich Buff" rather than the more ubiquitous "Hello, World".  You can create whatever message your heart desires.  :-)

Now you are ready! (I hope).  Connect your device or activate your AVD and click the Run icon. 

If the stars aligned (and these instructions are clear and accurate), you should see something like the following.


Congratulations! You've written your first mobile app using PhoneGap!

In a future blog post, I'll talk about making your app more dynamic with AJAX.

Have fun!!